Conference Room Guide
Contents
In Advance
Make sure you have setup following software’s on your computer
- iProjection (to connect projector)
- Zoom/ Skype or any other communication software
First Step (Connect to WIFI)
-
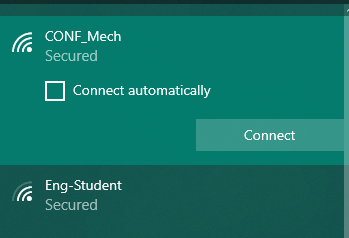
First, Connect to the CONF_Mech WIFI at the conference room (WIFI details are stuck on the wall)
-
Now, you have to set the Static IP address on your computer. IP range can be found in the same location as above mentioned
Here is the step to set Static IP address on Windows,
-
Go to the Control Panel and Click on Network and Sharing Center. It will open the Network and Sharing Center window

-
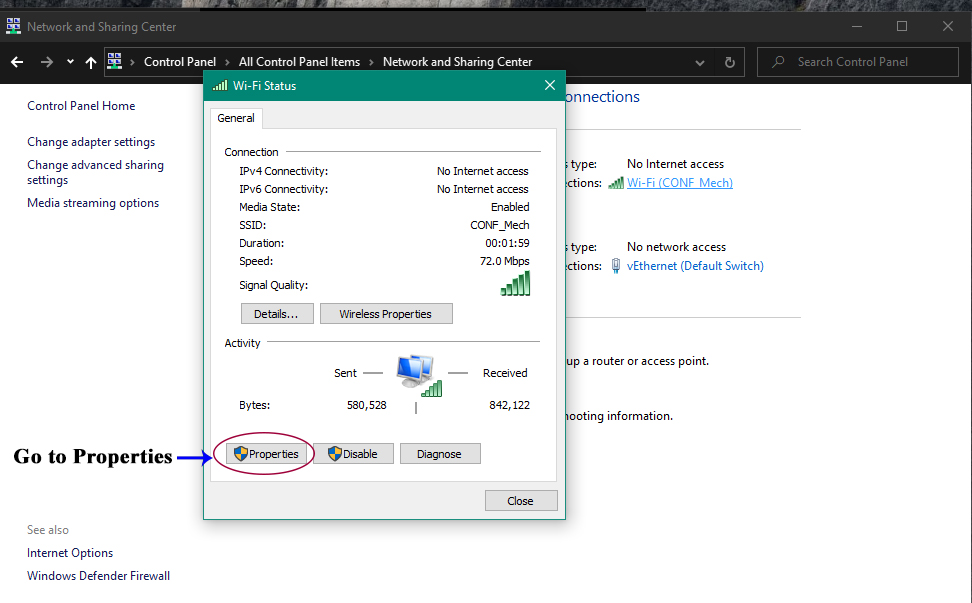
In the Network and Sharing center, you can see active networks. If you have connected to the CONF_Mech, it will show as in the following figure. Now click on the Wi-Fi (CONF_Mech) on the right side of the window under connections. It is shown in the picture. It will open a new window which shows the Wi-Fi status

-
In the Wi-Fi Status window, Click on Properties. Wi-Fi properties window will be opened.
-
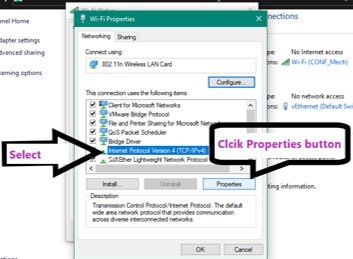
In the Networking Properties window, find the Internet Protocol Version 4 (TCP/IPv4) and Click on it.
-
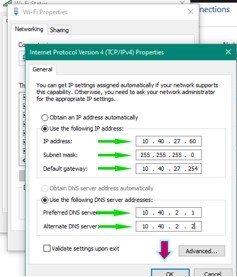
In the IPv4 Properties window, under General, select Use the following IP address. Once you click on the Use the following IP address, fields are enabled to enter values
- In the IP address field, enter the IP address value within the given range. (Ex: 10.40.27.43)
- In the Subnet mask field, enter "255.255.255.0"
- In the Default gateway field, enter the given IP address (Ex: 10.40.27.254)
- For the Preferred DNS server and Alternate DNS server fields, enter the given DNS values
- Finally, Click OK on all windows to save your changes
Set IP address on Mac,
-
Click on the Apple logo. You'll see this in the top left corner of your screen. A menu will dropdown

-
Click System Preferences. You'll see this under "About This Mac"
-
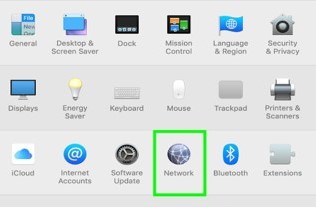
Click Network. You'll see this in the third organized row next to "iCloud"
-
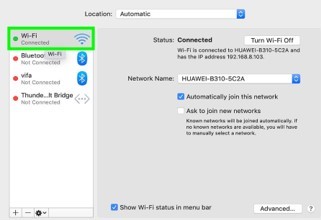
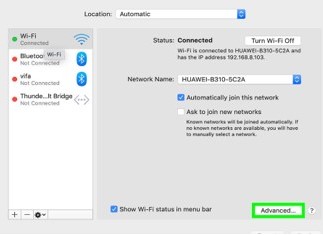
Click on the Wi-Fi in the left sidebar. Click Advanced. You'll find this at the bottom right corner of the window
-
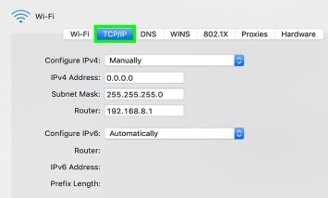
Click the TCP / IP tab. You'll see this along the top of the window with tabs for DNS, WINS, 802.1X, Proxies, and Hardware.
-
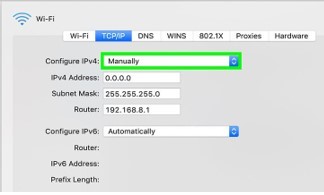
Click the dropdown menu next to "Configure IPv4," and select "Manually"
-
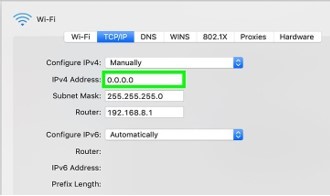
Enter an IP address that has described under IP address set on windows above
-
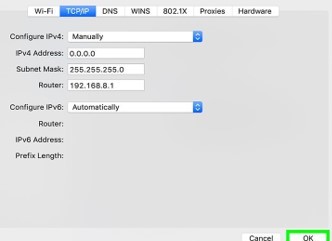
Click OK. Your IP address will now be changed
Connect to wireless Projector
In order to connect to the projector, you have to install IProjection software on your machine.
-
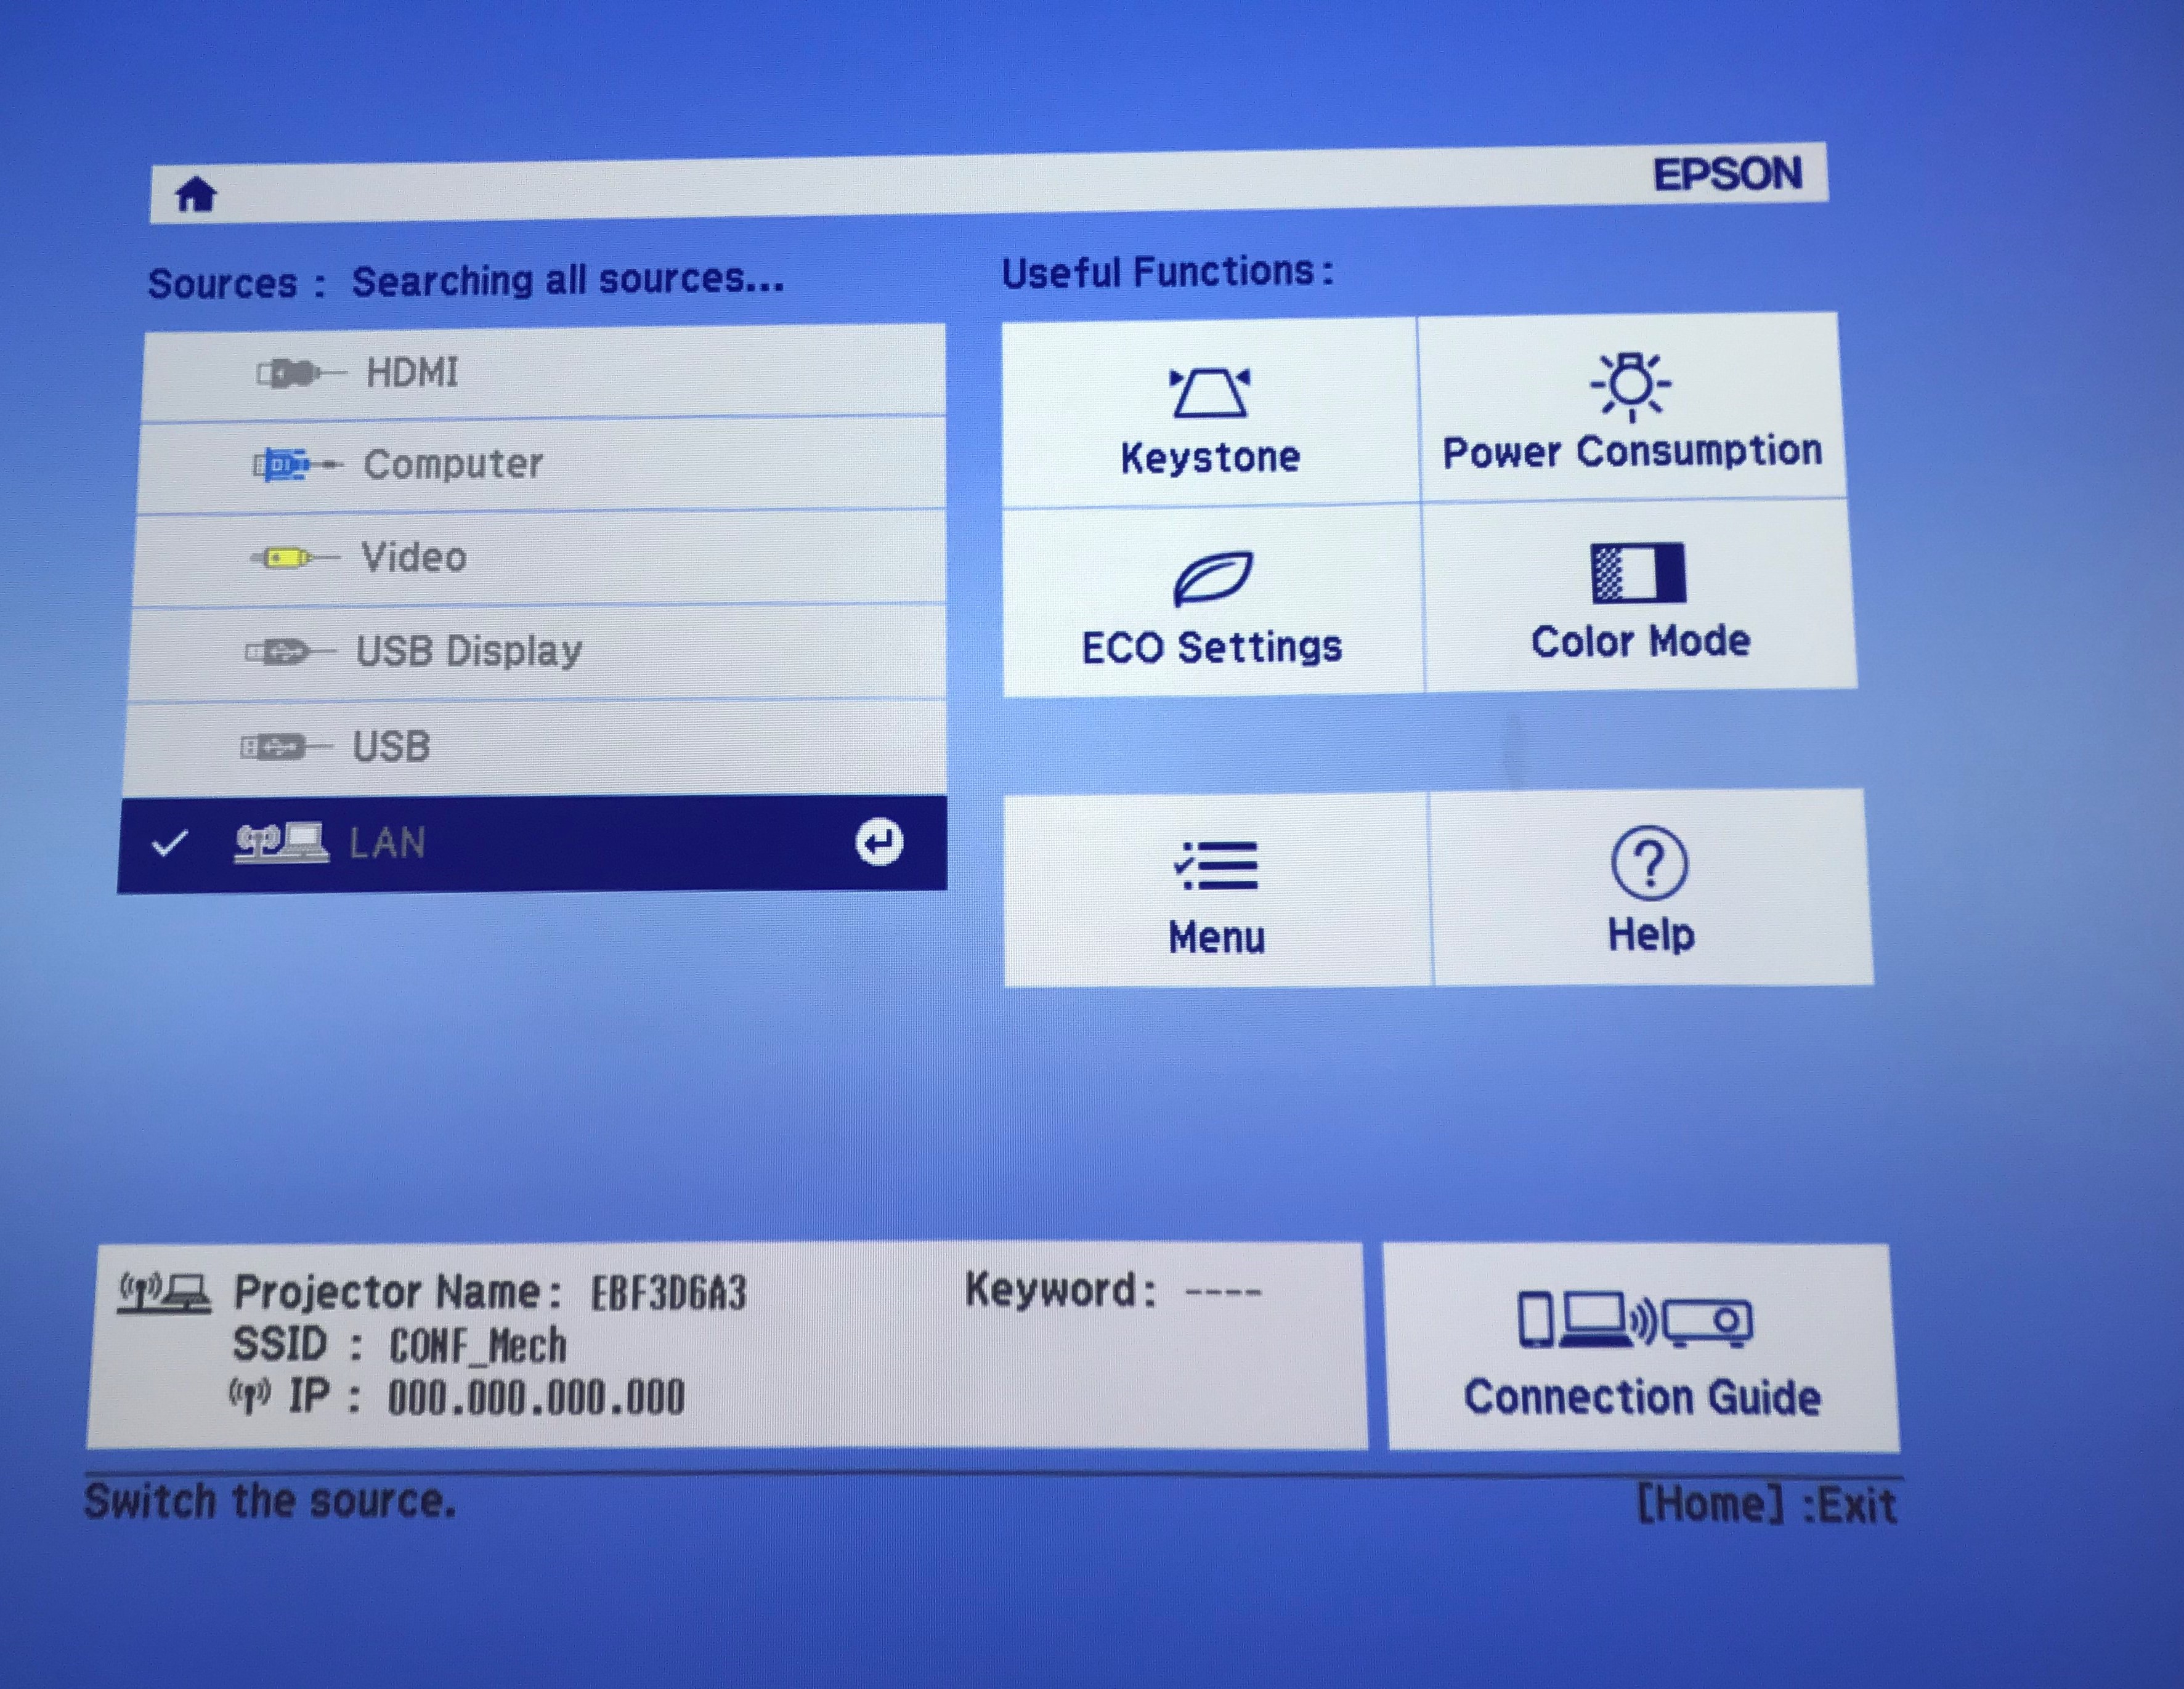
Turn on the projector
-
Select LAN (Wireless) and press Enter. If you use a mobile phone or tablet, scan Displayed QR Code. The projector displays an IP address and QR code on the projection surface
-
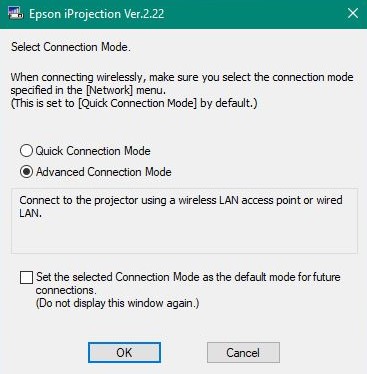
Now open IProjection software, and select Advanced Connection Mode. It will open the Advance connection window
-
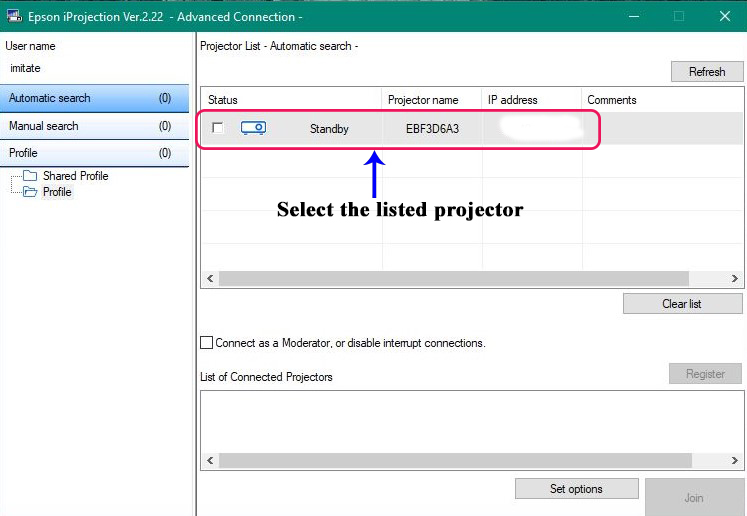
In the Projector List - Automatic search, available projectors will be list down. If you cannot see any projector in the list, please click Refresh button on the top right corner and it will show available projectors
However, if you don’t see any available projector, go to the Manual Search in the left sidebar. It will show search bar on the before Refresh button. In the search bar, please enter projector IP Address and click Search . It should list down projector on the Projector List.
If you cannot get any available projector, make sure you have connected to the same network which projector is connected
-
V. Now select the projector you want to connect from the Projector List, and then select one of the following options.
- You want all users to be able to become participants in the moderator function: Make sure Connect as a Moderator, or disable interrupt connections is not selected.
- You are the moderator user and you do not want other users to be able to interrupt the moderator presentation: Select Connect as a Moderator or disable interrupt connections.
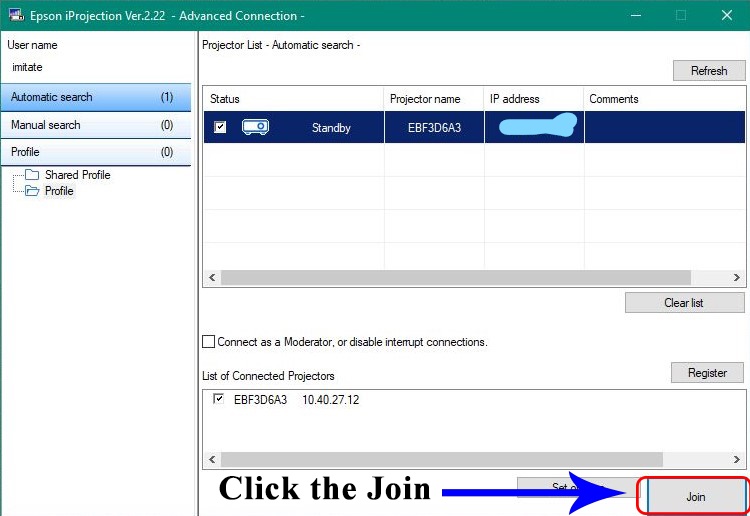
Click the Join button to connect with the projector. You'll find this at the bottom right corner of the window
-
When a connection is established, the computer screen is projected and the following toolbar is displayed on the computer screen

The computer screen for the user who connects first is projected in full-screen mode. Users who connect later can project their own screen by clicking the
 button on the toolbar or can control
the projected display from the projection control screen
by clicking the
  button on the toolbar
Additional:
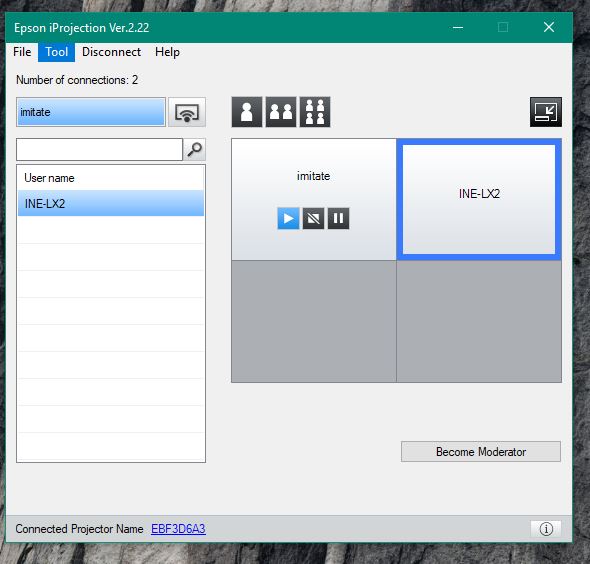
Use the projection control screen to change the number of projected panels, presenters, or the projection position

- Show: Click the play button. The computer screen is projected as it is.
- Stop: Click the stop button. The projected image stops. A black screen is projected while stopped.
- Pause: Click the pause button. The projected image pauses.
The paused image is projected, even if you make changes on the computer screen
Note:
- These buttons are not available for participants when using the moderator function
- The moderator can also control the other user’s projection using the projection control screen when using the moderator function
-
Click the panel of the user to be projected in the projection area. The selected panel is framed in blue
-
Perform one of the following operations to change the number of available panels in the projection area.
- o Project one panel in full-screen mode: Click the
 button.
 - Split the projected display in two and projecting the selected panel and the adjacent right or left panel: Click the
 button.
 - Split the projected display in four and projecting all four panels: Click the
 button.
The number of panels changes and the background colour for panels being projected becomes white
- o Project one panel in full-screen mode: Click the
Video Conference System
You can use the conference system using any video and/ or audio remote conferencing services. Following shows how to use with zoom.
-
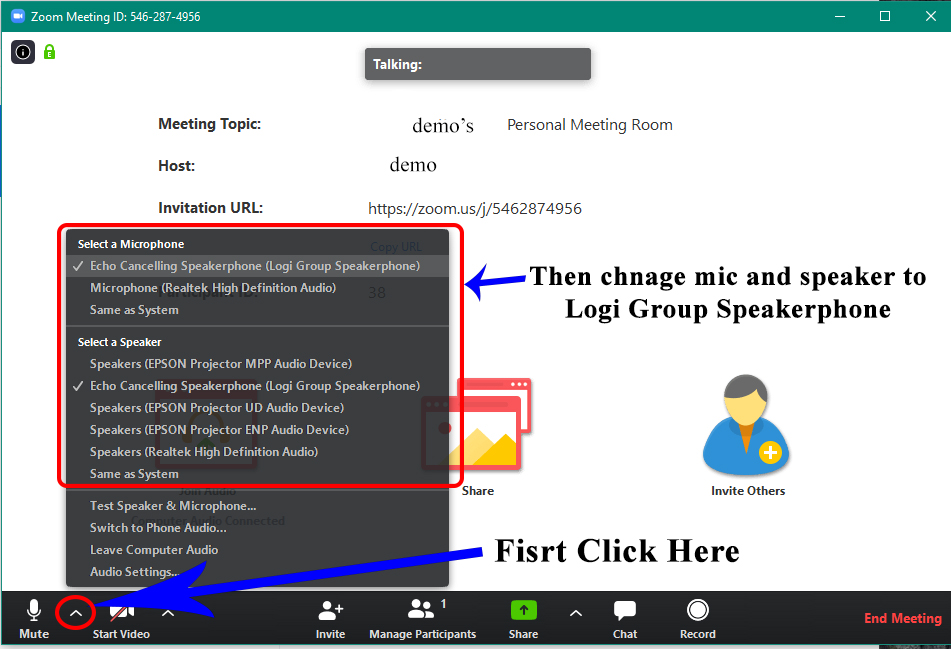
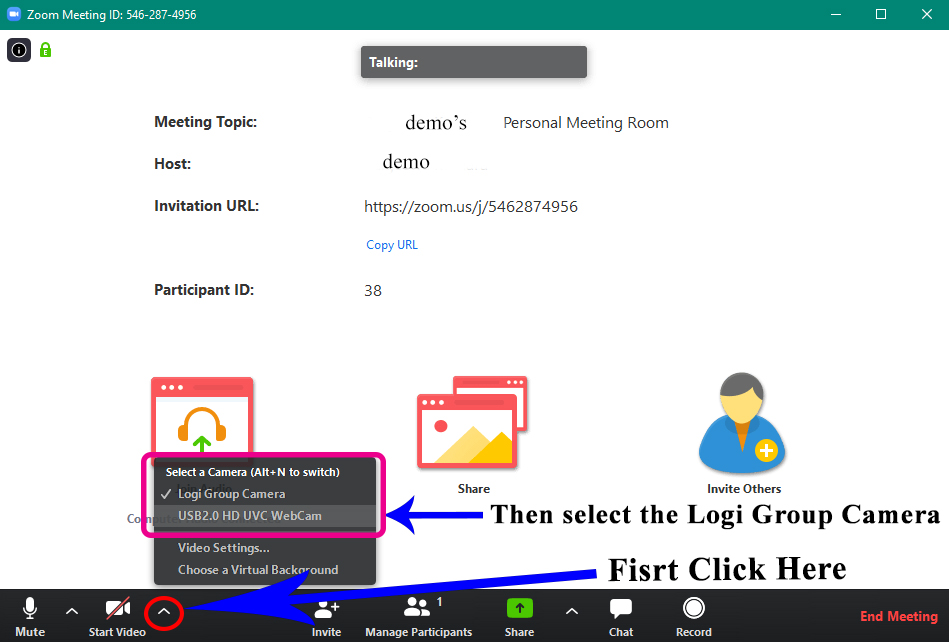
After you join a meeting, you need to change Microphone, Speaker and Camera to Logi Group Speakerphone and Camera
-
If you select Microphone and Speaker to Same as System, you need to change System Speaker and Mic to Logi Group in the System Settings
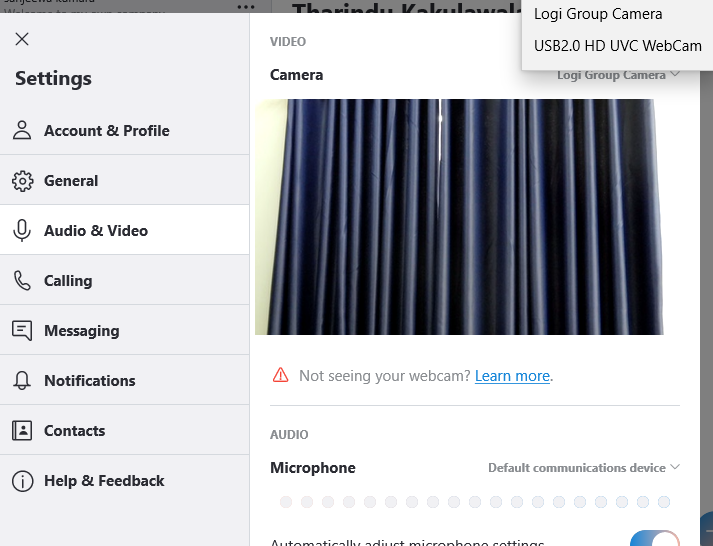
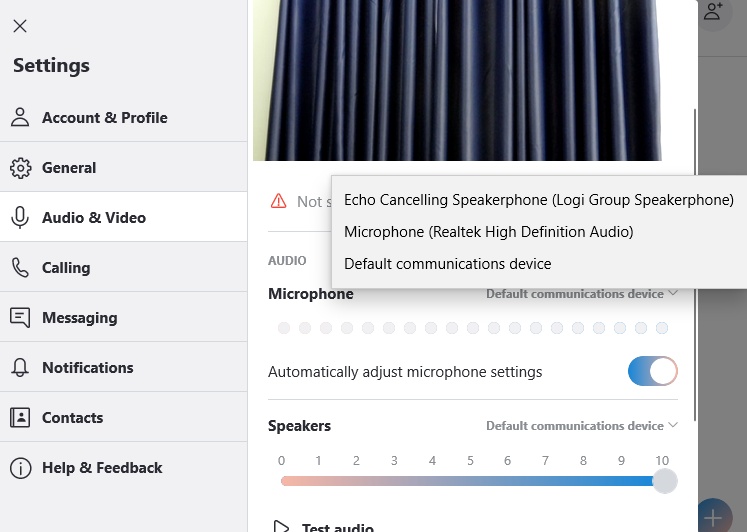
Following shows how to change speaker, mic and camera in Skype.
- Go to the Settings in Skype and select Audio & Video
- Then, Change the Camera to Logi Group Camera
- Change Microphone and Speaker to Logi Group Speakerphone
bellow in the same window
If you use any other services, you need to change Microphone, Speaker and Camera to Logi Group Speakerphone and Camera
Connect to Smart TV
You can connect to the smart TV wirelessly. Make sure you have connected to the CONF_Mech Wi-Fi.
- Go to project to a second screen and select Connect to a wireless display. If you use a mobile or tablet, go to wireless projection
- Then the available devices will be shown. Select Samsung TV
- It will connect to the tv and project laptop screen or mobile/ tablet screen
OR
-
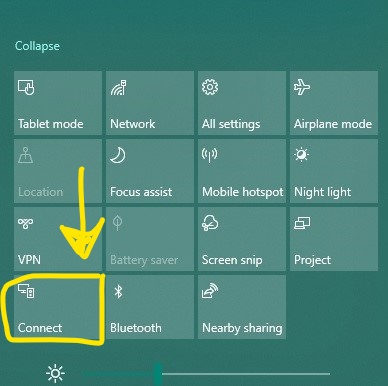
In windows, Click on notification button on the right side of the task bar
Then, Click on Connect and Continue from above step 2
